Showing posts with label DIY. Show all posts

Tuesday, April 29, 2014

DIY MIDI SKIRT

It’s the skirt of the season, and one of the easiest skirts to make. 
So get your sewing boots on follow suit. Scroll down for your DIY instructions.


Step 1: Choose your fabric.
I choose a very fiddly silk patterned fabric (because it was on sale at the fabric store), but I would normally suggest using a stretch so you won’t need to bother with hems.

Step 2: Measure
To find out how much fabric you will need, measure around your waist (at the level you want your skirt to sit). Then double this measurement to get the length of fabric you will need.

Step 3: Stitch a tube
Fold about 5 cms of the fabric over at the top, then pin and stitch to make a ‘tube’. Once you have this tube, thread some elastic through it. For elastic threading instructions, see my previous post here:

Step 4: Sew it up
Now line up the raw sides, right sides kissing each other, pin and stitch.

Step 5: Frolick 
Enjoy your new skirt by frolicking upon rooftops in the autumn, enjoying the view

Saturday, October 5, 2013

DIY SIMPLE SHIFT DRESS - TUTORIAL


A super simple DIY tutorial to re-create my easy, breezy black shift dress. Once you have this down, you can make so many different variations. The key is to pick a fabric that doesnt fray - that way you won't have to get bogged down with pinning and sewing hems and necklines. Happy DIY'ing!

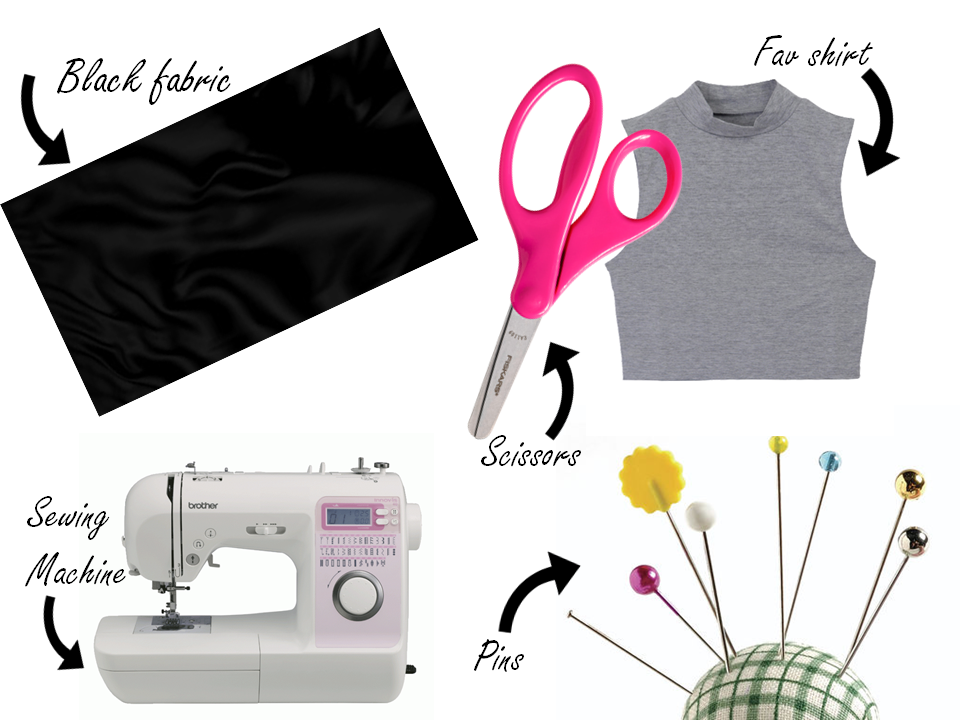
WHAT YOU WILL NEED.
STEP 1
Find a sleeveless shirt that fits you really well and lay this out on your chosen fabric. Your fabric should be folded in half with 'right sides' kissing each other (i.e. The side of the fabric that you will see when you are wearing the dress). The side that your top is laying on will be the 'inside' of the dress.
STEP 2
Trace around your top with a fabric pen or marker. Give it an extra 2cm to allow for stitching. 
STEP 3
To trace the remainder of the dress simply continue the lines down. The more full you want your dress the wider you should draw these lines. 
STEP 4
Cut out your pattern! 
STEP 5
Pin and stitch your garment where the blue lines are marked. 

STEP 6
Turn your dress the right way out.

STEP 7
To create an asymmetrical hem, first mark and cut a semi-circle at the hem of the dress.

STEP 8
Now cut only the front piece of fabric in a semi-circle going in the other direction.  
And you're done!


Sunday, April 14, 2013

DIY PEPLUM - MATCHING SEPARATES

Matching separates continue to take the world by storm this season. You can make this set in every colour of the rainbow. 'How to' tutorial coming up next...

Friday, August 31, 2012

DIY FLURO PINK SKIRT

This has got to be the most simple but effective DIY. It's a basic puff skirt with an elastic waist and takes very little time and money to create!


What you will Need 

1 piece of fabric
in any colour and style(I usually use a fabric that is a little bit stiff because I prefer a bit more structure, however you can softer fabrics if you would like the skirt to be more 'flowy'. Also, pick a fabric that wont fray when you cut it. That way you don't even need to stitch the hem!

1 piece of elastic. 
Wrap the elastic around your waist to figure out the length you will need. Don't make it too tight, or it wont be very comfortable to wear!

Scissors 
Sewing pins
Needle and Thready or Sewing Machine
1 Safety pin

Directions 

Step 1
Wrap the fabric around your waist to measure how much you will need. Wrap the fabric around your waist one and a half times to get the size you need. Of course you can use more or less fabric depending on how 'puffy' or straight you want the skirt to be. The more fabric you use, the puffier the skirt will look. 

Step 2
Lay the fabric out flat. Fold the top part (where your waist will be) over, to create a tube for the elastic to be threaded into.

Step 3 
Use sewing pins to pin down the fold and then stitch along in a straight line. If you are patient and dont have a sewing machine, this can easily be hand stitched. However a sewing machine is much quicker. If you look at the diagram below you can see where the pins need to be placed, and where you need to stitch the straight line.


 Step 4 
Once you have done this, you should have a little 'tube' for the elastic to be threaded into. The best way to thread the elastic into the tube is to attach a safety pin to one end of the elastic before you push it through.  The image below will give you an idea of how to safety pin will help you push the elastic through the tube. 

Image from  http://www.thetraintocrazy.com/messenger-bag-sew-along-part-3.html


You should now have something that looks like this!


Step 5
Now simply fold the fabric in half putting the left side and the right side together, line them up, and stitch along in a straight line. 


Finish 
Trim off the excess fabric and elastic and turn the skirt out the right way (the above steps are done inside out). And there you have it.. 

Photo by Amy Dyson Photography, Makeup by Alana Winter-smith 


Wednesday, December 21, 2011

DIY ZARA SEQUIN POUCH- Tutorial

I said it would happen, so here it is! Just in time for christmas. A DIY version of the Zara Sequin pouch. If you're not keen on forking out $60 for a little bag, then read on and follow the instructions below. Happy DIY''ing!


What you will need
1. sequin fabric in colour of choice
2. Scrap fabric for lining
3. scissors
4. needle and thread
5. zipper
Optional
6. 'facing'
7. Sewing machine


The Fabric
I chose this black sequin and hand beaded fabric that I had sitting in my fabric box for over a year. I’ve never really had any use for it until now! Sequin fabric can run on the expensive side, so I would recommend checking out the scraps/remnants box at your local fabric store. This is where fabric goes when there is only a small amount left, and so not enough to stay on the roll. I picked up over a metre of this fabric from a remnants box for only $4.50! So shop around and I’m sure you’ll find something that isn’t too pricey. Even if you cant find any in the remnants box, you should be able to get away with buying 20-30 cm’s from the roll, depending on how big you want your pouch. A word of warning- even though the hand beading on this fabric is beautiful, it was such a hassle to sew! So if you are planning to use a sewing machine, do not get beaded fabric! 


The Zipper
I love the big gold zipper that you can see in the picture below as it is more true to the Zara version. But it was too small for this project. So I opted for a regular black dress zipper, mainly for the cost advantage. It will set you back about $2 at your local fabric store. 


Step One
Cut 2 pieces of the sequin fabric and two pieces of the lining fabric into rectangles of the same size. Make them about 1.5 cms bigger than you would like the final pouch size to be. This will allow for seams when you sew them together. 
So you should have 4 pieces of fabric (or 6 if you are using ‘facing’)

Step Two
Pin the lining fabric to the inside of the sequin fabric and stitch it down. If you are using the facing you will need to stitch this in as well. You should have now have a piece of fabric that is two layers thick; the sequin layer and the lining layer (or three layers with the facing). Repeat this step for the other pieces of fabric. You will now have two pieces of fabric, with each being two layers thick (or 3 with the lining.. I think you get the point :). 


Step Three - adding the zipper
Place the two pieces of fabric together so that the ‘right sides’ of the sequin fabric are facing each other. What I mean by 'right sides' is the side of the fabric that will be on the outside when the pouch is finished. So place the fabric together so that the sequin sides of the fabric are ‘kissing each other’. This is important, so that when you eventually come to turn the pouch out, the right side of the fabric will be on the outside. Now pin the fabric together along the side where you would like the zipper to be.


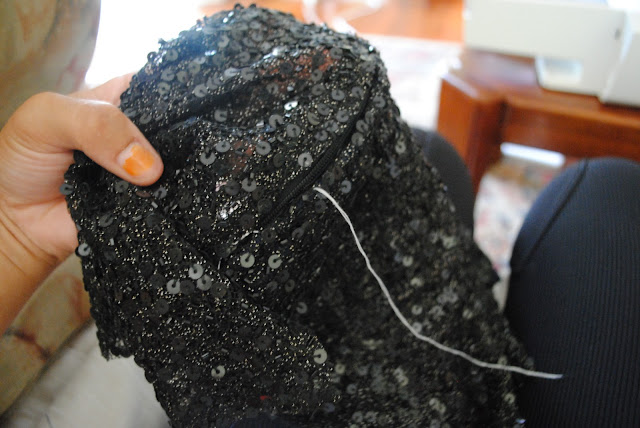
Take some white cotton (or any other bright colour) and make some very wide ‘tack’ stitches along where the fabric has been pinned. This stitching can be wide as it will be taken out later.

Now unfold the two pieces of fabric by opening the side that is unstitched and lay it out flat so that the 'wrong' side of the fabric is facing up- or in other words, the lining should be facing up. You should be able to unfold a flap where you have just done the tack stitching. This is where you place the zipper. 

Place the zipper face down in the middle of the part that you have just unfolded and pin the zipper down. Use a needle and thread or sewing machine to stitch the zipper down on each side of the teeth. Make sure you do a nice tight stitch all the way along the zipper, from the very top the very bottom. There is nothing worse than a loose zipper! 


Now you can unpick the white tack stitching  to  'reveal’ the zipper!  

Step Four
Now fold the 'right sides' of the fabric back together (i.e the sequin sides are 'kissing' again) and stitch all the way around the edge of the pouch . Make sure you unzip the zipper before you do this, otherwise you wont be able to turn the pouch out when you have finished.

Once you have stitched all the way around the rectangle, you can turn the pouch out the right way. In other words you are doing to opposite of turning it inside out. 


et voila!